Webhooks
Webhooks are available through certain droplets and events.
Publish
You can add one or more webhooks on publish events. These events include each time a page or site is published within the admin panel or site editor. To add a publish webhook, follow the steps below:
Navigate to the site's settings tab inside the admin panel.
Click "Add Webhook" and paste in the url.
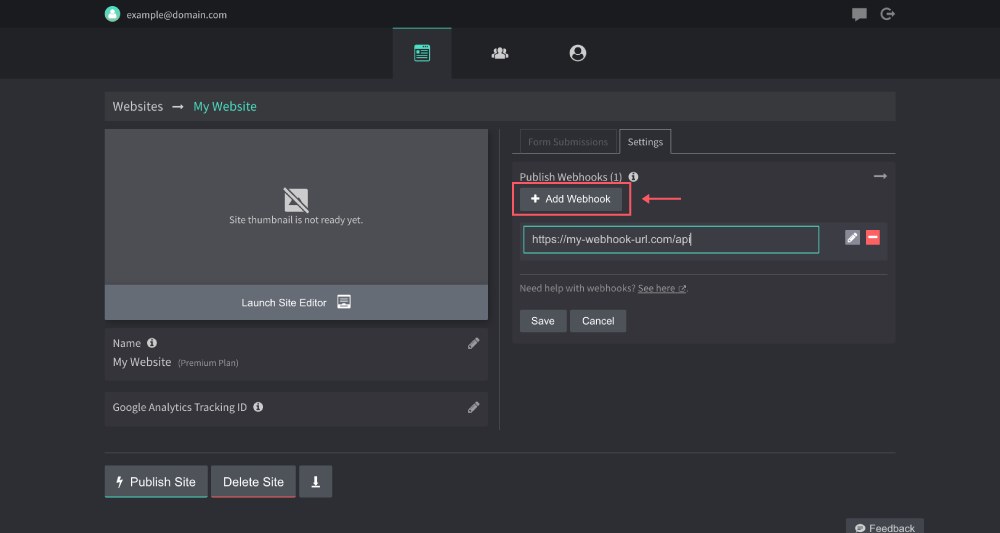
If you would like to add custom key/values to the webhook payload, you can do so by clicking the edit pencil next to the webhook URL.
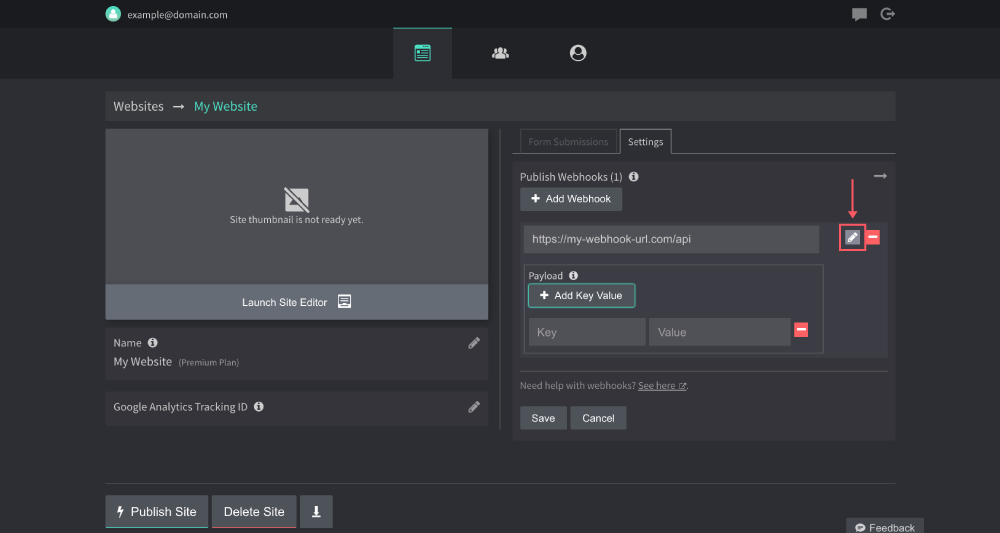
After you're done, click "Save" and you're ready to go!
Payload
The JSON payload that will be sent to your webhook endpoint will always consist of the following:
{
  "_meta": {
    "siteFiles": "array of all site files",
    "siteName": "site name string",
    "siteId": "site id string",
    "timeStamp": "published date string"
  }
  .. your custom payload
}
Lambda Publish Template
If you own an AWS account, we have put together a Lambda template you can use to handle some of the backend work needed for publishing your site files to a server. See the following Github Repo for more on that.
Droplets
The form & button droplets offer a webhook option. You can have up to 10 webhooks per droplet. Webhooks here will run after a site visitor successfully submits your form or presses your button. To open the webhooks settings do the following:
Hover over the droplet options and click
Droplet Settings. Then click theWebhookstab.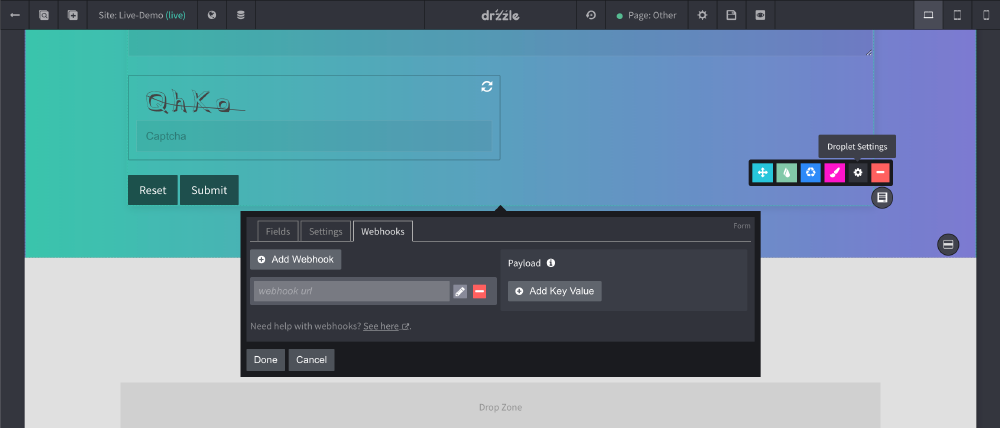
Click add webhook and enter your endpoint url. It's that easy.
Payload
The payload that will be sent to your endpoint will always consist of the following:
{
  "_meta": {
    "siteName": "string",
    "siteId": "string",
    "pageName": "string",
    "pageUrl": "string",
    "pageId": "string",
    "dropletId": "string",
    "submitted": "date string"
  }
}
Adding to Payload
In all webhook droplets you can add custom key value pairs to send to your endpoint(s). You can set them in the webhook settings dropdown.
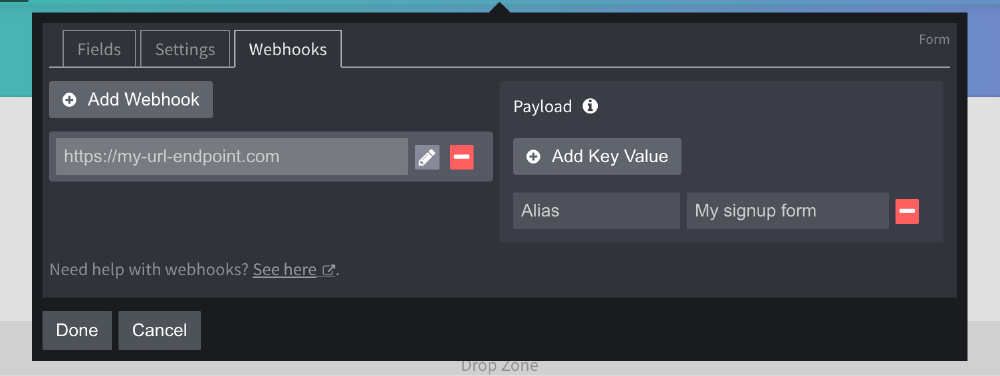
For form droplets specifically, it's fields will automatically be added to the payload as well. They will be grouped by label and value the site visitor submits.
Take a form with these fields for example:
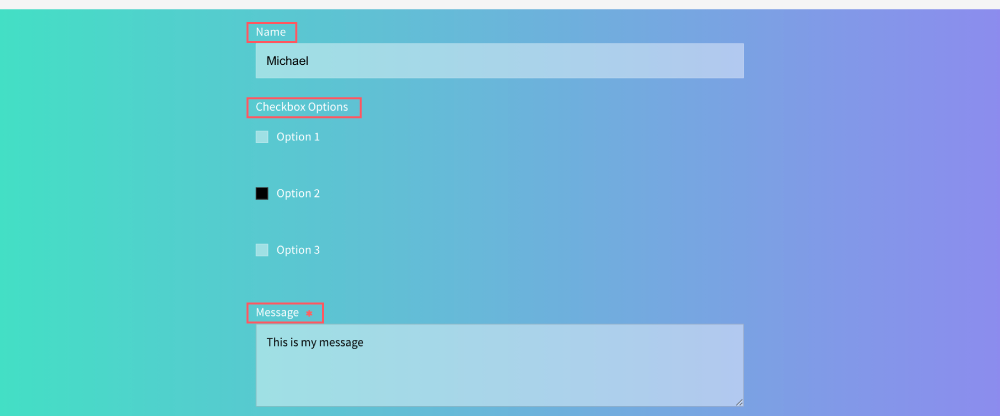
The payload sent to your endpoint, after a successful form submission, would look like this:
{
  "_meta": {
    "siteName": "my site name",
    "siteId": "my-site-id",
    "pageName": "page 1",
    "pageUrl": "https://mydomain.com/contact-us",
    "pageId": "my-page-id",
    "dropletId": "form-droplet-id",
    "submitted": "2021-01-01T19:12:03.310Z"
  },
  "Name": "Michael",
  "Checkbox Options": "Option 2",
  "Message": "This is my message"
}
